Best Fire Starters for Camping
The Art of Fire Starting: A Camper’s Essential Skill
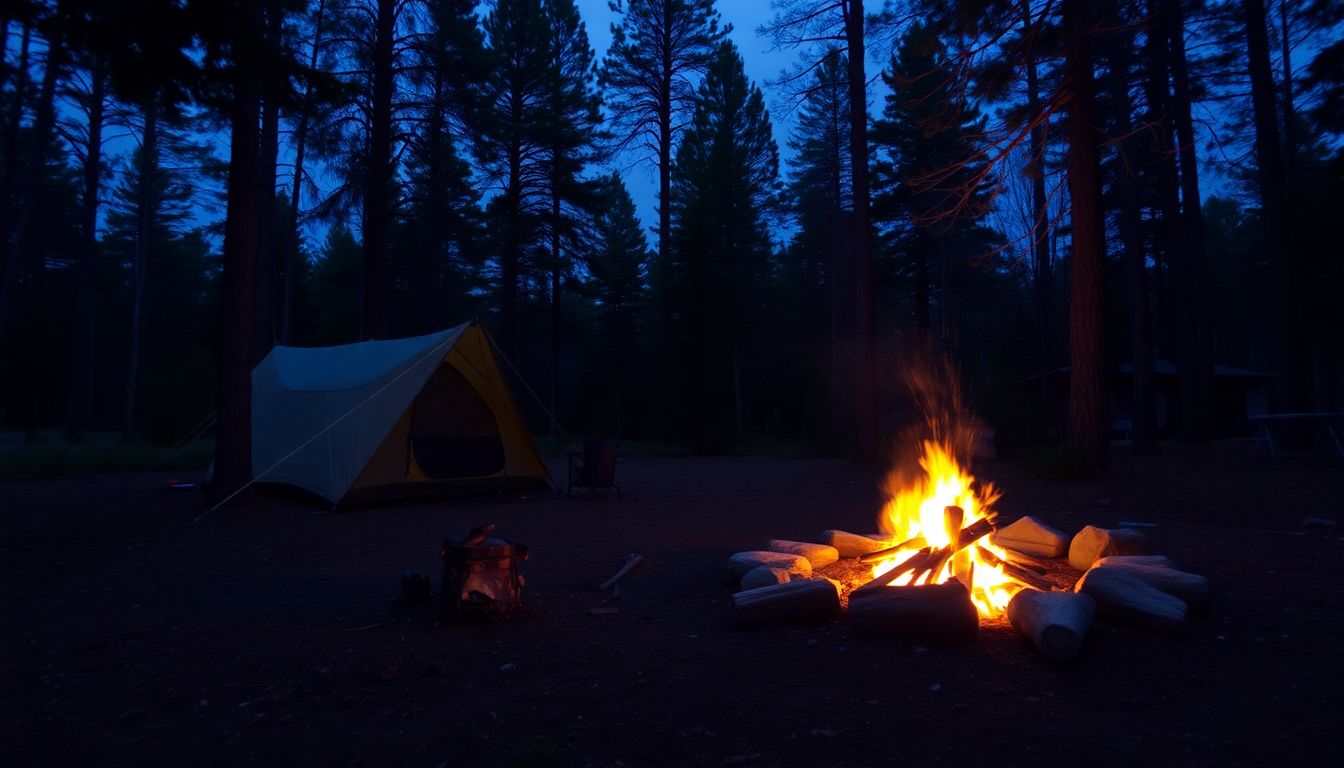
As an avid camper and outdoor enthusiast, I’ve come to appreciate the vital importance of mastering fire starting. There’s an undeniable primal satisfaction in creating a roaring campfire from scratch, especially when you’re surrounded by the raw beauty of nature.
But beyond the romantic notions, fire starting is a critical survival skill that every camper should possess.
Understanding Fire Basics
Before we dive into specific fire starters, it’s crucial to grasp the basic principles of fire. Fire requires three key elements to thrive: fuel, oxygen, and heat.
This trio forms the “fire triangle,” and as a camper, your job is to bring these elements together effectively.
Fuel can be any combustible material, ranging from dry twigs and leaves to specially designed fire starters. Oxygen is typically abundant in outdoor settings, but you’ll need to ensure proper airflow.
Heat is where your fire starter comes into play – it provides the initial spark or flame that kickstarts the entire process.
How to Start a Fire: A Step-by-Step Guide
- Gather your materials: Collect tinder, kindling, and larger fuel wood.
Tinder should be fine, easily combustible materials like dry grass, paper, or bark.
Kindling consists of small twigs and sticks, while fuel wood includes larger branches and logs.
- Create a fire lay: Arrange your materials in a way that allows for good airflow.
Popular methods include the teepee, log cabin, and lean-to structures.
Each has its advantages depending on the conditions and your needs.
- Prepare your fire starter: Whether you’re using a commercial product or a DIY solution, have it ready to go.
This could be anything from a ferrocerium rod to a simple lighter.
- Ignite the tinder: Use your fire starter to light the tinder.
This is where patience and technique come into play.
Protect the small flame from wind and add oxygen by gently blowing if needed.
- Add kindling: Once the tinder catches, carefully add small twigs and sticks.
Start with the smallest pieces and gradually increase the size as the fire grows.
- Build the fire: As the kindling catches, begin adding larger pieces of wood.
Continue to watch and adjust the fire, ensuring it has enough fuel and oxygen to thrive.
Patience is key, especially in challenging conditions. Rushing the process can often lead to failure, so take your time and pay attention to each step.
Commercial Fire Starters: Reliability in a Package
When it comes to commercial fire starters, two brands have consistently impressed me with their reliability and effectiveness: Light My Fire and Zippo.
Light My Fire: Swedish Firestarting Innovation
Light My Fire, a Swedish company, has revolutionized the fire-starting game with their Swedish FireSteel. This modern take on the traditional ferrocerium rod produces a shower of sparks at temperatures up to 3,000°C (5,400°F).
Here’s why I’ve come to love it:
- All-weather performance: It works in rain, snow, or shine.
- Long-lasting: A single rod can provide up to 12,000 strikes.
- Compact and lightweight: It won’t weigh down your pack.
- Works when wet: Unlike matches or lighters, moisture isn’t an issue.
To use the Swedish FireSteel, hold the striker at a 45-degree angle to the rod and scrape it down firmly. The resulting sparks are hot enough to ignite even damp tinder, making it a reliable choice in various conditions.
Zippo: More Than Just Lighters
While Zippo is famous for their iconic lighters, they’ve expanded into the outdoor market with some impressive fire-starting products. The Zippo Emergency Fire Starter Kit has become a favorite among many campers I know.
Here’s what makes it stand out:
- Water-resistant case: Keeps your fire-starting materials dry.
- Includes waxed tinder sticks: These catch easily and burn for several minutes.
- Reliable flint wheel ignition: Similar to a traditional Zippo lighter.
- Compact and easy to use: Perfect for emergency kits or regular camping trips.
To use the Zippo kit, simply remove a tinder stick, fray the end, and use the flint wheel to create sparks. The waxed tinder catches easily and burns for several minutes, giving you plenty of time to build your fire.
DIY Fire Starters: Ingenuity in the Wild
While commercial products offer convenience and reliability, there’s something deeply satisfying about creating your own fire starters. Here are two popular DIY options that I’ve found to be incredibly effective:
Cotton Balls and Petroleum Jelly
This simple yet effective fire starter is a favorite among seasoned campers, and for good reason. Here’s how to make and use them:
- Take a cotton ball and work petroleum jelly into it thoroughly.
The goal is to saturate the cotton fibers with the jelly.
- Store the prepared cotton balls in a waterproof container.
An old pill bottle or small plastic container works well.
- To use, pull the cotton ball apart slightly to expose some of the dry fibers.
- Light the exposed fibers with a match or spark.
These petroleum jelly-infused cotton balls can burn for up to 5 minutes, giving you plenty of time to get your kindling going. The petroleum jelly acts as a slow-burning fuel, while the cotton provides the initial catch point for your spark or flame.
Wax-Dipped Matches
Waterproofing matches with wax is an old trick that still works wonders, especially in damp conditions. Here’s the process:
- Melt paraffin wax in a double boiler.
Be careful not to overheat the wax, as it can be flammable.
- Dip strike-anywhere matches in the melted wax, leaving the striking tip exposed. You can dip them many times to build up a thicker coating.
- Let the matches cool and harden, then store them in a waterproof container.
To use, simply strike as you would a normal match. The wax coating will help the match burn longer and resist moisture, making it an excellent option for wet or windy conditions.
Natural Fire Starters: Nature’s Gift to Campers
Mother Nature provides some excellent fire-starting materials if you know where to look. Learning to identify and use these natural fire starters can be a game-changer when commercial options aren’t available or you’re practicing wilderness survival skills.
Birch Bark
Birch bark is one of nature’s best fire starters. It’s rich in oils that make it highly flammable, and it burns even when damp.
To use birch bark:
- Peel thin layers from a fallen birch tree or collect loose pieces from the ground.
- Shred the bark into small pieces or roll it into a tight bundle.
- Light the edges of the bark with a spark or flame.
The oils in the bark will catch quickly and burn hot, helping to ignite your kindling.
Fatwood
Fatwood, also known as “fat lighter” or “pine knot,” is resin-saturated pine wood that ignites easily and burns hot. You can often find it in the stumps or lower branches of dead pine trees.
To use fatwood:
- Shave off thin curls of wood using a knife.
- Create a small pile of these shavings.
- Light with a spark or flame.
The resin in fatwood makes it highly flammable and water-resistant, making it an excellent choice for wet conditions.
Dried Grass
Dried grass makes excellent tinder when it’s bone dry. Look for tall, dead grass in open areas.
To use:
- Gather a handful of dry grass.
- Loosely bundle it together.
- Light the edges of the bundle with a spark or flame.
Dried grass catches fire quickly but burns fast, so be ready to add kindling as soon as it ignites.
Pine Cones
Pine cones, especially dry ones, can be excellent fire starters. The scales catch fire easily and burn hot.
To use pine cones:
- Collect dry, open pine cones.
- Place one or two at the base of your fire lay.
- Light the edges of the scales with a spark or flame.
As the scales catch and curl, they’ll create small pockets of flame that can help ignite your kindling.
Fire Starting Techniques for Challenging Conditions
Sometimes, starting a fire isn’t as simple as striking a match. Weather conditions, altitude, and available materials can all present challenges.
Here are some techniques for tougher situations:
Wet Weather Fire Starting
Wet conditions can make fire starting particularly challenging, but with the right approach, it’s still possible to get a fire going. Here’s how:
- Find dry materials under dense foliage or inside dead standing trees.
Look for the underside of fallen logs or the interior of tree bark.
- Use your body heat to dry out damp tinder.
Place slightly damp tinder inside your clothes, close to your body, for a while before attempting to light it.
- Create fine shavings from the interior of larger pieces of wood.
The inside of logs often remains dry even in wet conditions.
- Use fire starters that produce their own oxidizer, like storm-proof matches or chemical fire starters.
These can ignite even in very damp conditions.
- Build a platform for your fire using dry logs or rocks to elevate it from wet ground.
- Create a windbreak to protect your fledgling fire from rain and wind.
This can be done with a tarp, natural materials, or by choosing a sheltered location.
High Altitude Fire Starting
At high altitudes, lower oxygen levels can make fire starting challenging. The thinner air means fires may burn less efficiently.
To overcome this:
- Create a larger tinder bundle than usual.
This provides more fuel for the initial ignition.
- Use oxygen-rich fire starters like potassium permanganate and glycerin. When mixed, these chemicals create an exothermic reaction that can ignite tinder.
- Shield your fire from wind to conserve heat.
Wind can quickly dissipate the heat needed for ignition at high altitudes.
- Build a smaller, more concentrated fire lay.
This helps concentrate the available oxygen and heat.
- Be patient and persistent.
It may take longer to get a fire going at high altitudes, but with perseverance, it’s possible.
Advanced Fire Starting Methods
For those looking to expand their fire-starting skills beyond the basics, here are some advanced methods that can be both practical and fun to master:
Bow Drill Method
The bow drill is a friction-based method that’s been used for thousands of years. It requires some practice but can be incredibly effective.
Here’s how it works:
- You’ll need a bow (a flexible piece of wood with a string), a spindle (a straight stick), a fireboard (a flat piece of wood), and a handhold (a piece of wood or stone to hold the top of the spindle).
- Create a small depression in the fireboard and place your tinder bundle beneath it.
- Wrap the bow string around the spindle and place the spindle in the depression.
- Use the bow to spin the spindle rapidly while applying downward pressure with the handhold.
- The friction creates an ember, which you then transfer to your tinder bundle.
This method requires physical effort and practice, but it’s a valuable skill for any serious outdoorsperson.
Fire Piston
A fire piston is a clever device that uses rapid air compression to create heat and ignite tinder. Here’s how to use one:
- Place a small piece of tinder (char cloth works well) in the end of the piston.
- Insert the piston into the cylinder and strike it down hard and fast.
- The rapid compression of air creates enough heat to ignite the tinder.
- Quickly remove the piston and transfer the glowing ember to your tinder bundle.
Fire pistons are compact, reliable, and can work in wet conditions, making them a great addition to any survival kit.
Solar Fire Starting
On sunny days, you can harness the power of the sun to start a fire. This method requires a clear sky and some patience, but it can be effective:
- Use a magnifying glass, fresnel lens, or even the bottom of a soda can polished with chocolate to focus sunlight.
- Direct the focused beam onto a small, dark piece of tinder.
- Hold steady until the tinder begins to smoke and eventually ignites.
This method is silent and doesn’t consume any resources, making it ideal for survival situations where conservation is key.
Fire Safety: A Critical Reminder
As we wrap up our discussion on fire starters, it’s crucial to emphasize fire safety. The ability to start a fire comes with significant responsibility.
Here are some key safety points to always keep in mind:
- Check local regulations before starting a fire.
Some areas have strict fire bans during dry seasons.
- Never leave a fire unattended. A gust of wind can quickly turn a controlled fire into a dangerous situation.
- Keep your fire a manageable size.
Bigger isn’t always better when it comes to campfires.
- Have water or sand nearby to extinguish the fire if needed.
- Clear the area around your fire pit of flammable materials.
- Ensure your fire is completely out before leaving your campsite.
Douse it with water, stir the ashes, and repeat until everything is cold to the touch.
- Be aware of your surroundings.
Overhanging branches, dry grass, or strong winds can all contribute to fire spread.
- Teach children about fire safety and always supervise them around fires.
With great fire-starting power comes great responsibility. Use these tools and techniques wisely, and they’ll serve you well on countless camping adventures while keeping you and the environment safe.
Frequently Asked Questions
What is the best fire starter for camping?
The best fire starter for camping depends on your specific needs and conditions. Ferrocerium rods like the Swedish FireSteel are popular for their reliability in all weather conditions.
For ease of use, many campers prefer storm-proof matches or lighter/tinder combinations like the Zippo Emergency Fire Starter Kit.
How do you start a fire when everything is wet?
To start a fire in wet conditions, look for dry materials under dense foliage or inside dead standing trees. Use waterproof fire starters like petroleum jelly-soaked cotton balls or storm-proof matches.
Create fine shavings from the interior of larger pieces of wood, which often remain dry.
Build your fire on a platform to elevate it from wet ground.
What household items can be used as fire starters?
Many household items can be used as fire starters. Dryer lint, wax paper, cardboard egg cartons filled with sawdust and wax, and cotton balls soaked in petroleum jelly are all effective.
Even potato chips, because of their oil content, can work in a pinch.
Is it legal to use fire starters while camping?
The legality of using fire starters while camping depends on local regulations. In most established campgrounds, fire starters are allowed. However, some wilderness areas or national parks may have restrictions, especially during fire seasons.
Always check local rules before starting a fire.
How long do commercial fire starters typically last?
The lifespan of commercial fire starters varies widely. Ferrocerium rods can last for thousands of strikes.
Waterproof matches might have a shelf life of several years if properly stored. Fuel-based fire starters like cubes or gels usually burn for 5-10 minutes per use.
What’s the difference between a fire starter and tinder?
A fire starter is a tool or material used to create the initial spark or flame, such as matches, a lighter, or a ferrocerium rod. Tinder is the easily combustible material that catches that initial spark and burns long enough to ignite kindling.
Some products mix both, like wax-infused tinder cubes.
Can you make fire starters at home?
Yes, you can make effective fire starters at home. Popular DIY options include coating cotton balls with petroleum jelly, dipping cardboard strips in wax, or filling cardboard egg cartons with sawdust and wax.
These homemade options can be just as effective as many commercial products.
How do you use a ferrocerium rod to start a fire?
To use a ferrocerium rod, hold it close to your tinder bundle and strike it firmly with the striker (often the back of a knife blade) at a 45-degree angle. This creates a shower of hot sparks.
Aim these sparks at your tinder.
Once the tinder catches, gently blow on it to provide oxygen and help it grow into a flame.
What natural materials make good fire starters?
Several natural materials make excellent fire starters. Birch bark is highly flammable because of its oil content.
Fatwood, or resin-saturated pine wood, ignites easily and burns hot.
Dry grass, pine needles, and certain fungi like amadou can also work well as natural tinder.
How do you start a fire without matches or a lighter?
There are several ways to start a fire without matches or a lighter. Friction-based methods like the bow drill or hand drill can create an ember.
A fire piston uses air compression to generate heat.
In sunny conditions, a magnifying glass can focus sunlight to ignite tinder. Flint and steel or ferrocerium rods can also create sparks to start a fire.
Key Takeaways:
- Understanding the fire triangle (fuel, oxygen, heat) is crucial for successful fire starting.
- Commercial fire starters like Light My Fire and Zippo offer reliability and ease of use in various conditions.
- DIY fire starters can be effective, economical, and satisfying to create.
- Natural materials like birch bark and fatwood can serve as excellent fire starters in a pinch.
- Advanced techniques like the bow drill method can be valuable skills in survival situations.
- Always prioritize fire safety and follow local regulations when starting fires outdoors.